MASTER TEXTURE MAPPING IN RHINO and V-RAY: A Step-by-Step Guide for Beginners
FUNDAMENTALS & SET-UP
When starting your rendering and texture-mapping journey, you should accept some simple truths to accelerate your learning process. When it comes to texturing, making materials, and mapping, here are the fundamentals:
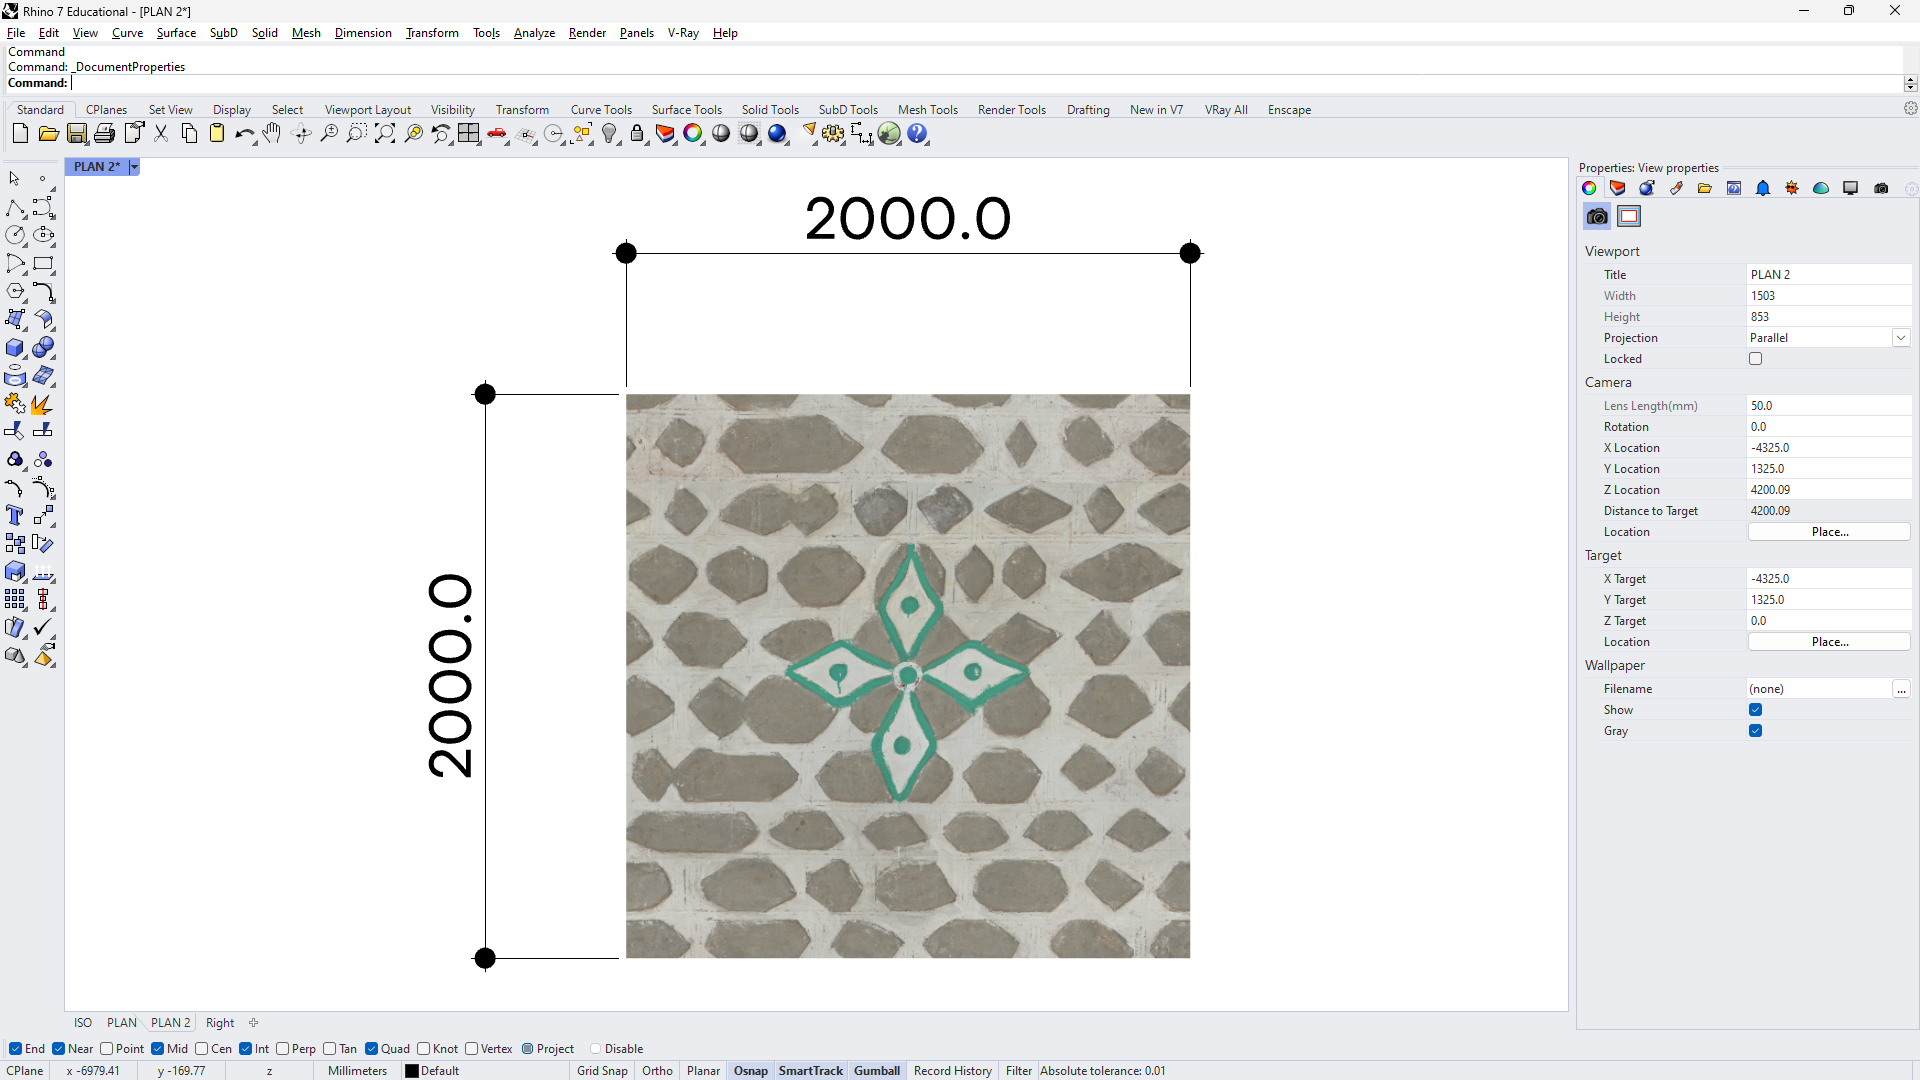
Use textures with known dimensions! Usually, sites provide you with the scanned textures' dimensions; more often than not, those dimensions are 2x2 meters square textures.
Accept that most architectural designs abide by the 90-degree angle; therefore most mapping will be cubic (aka Box Mapping). And this is NOT a bad thing! Use it to your advantage.
Use normal maps, never bump… bump… ew!
Use simple surfaces and NOT solid geometry. This is the difference between calculating 1 face vs. 6 faces on a single wall. 83% reduction in surfaces to calculate, baby!
Finally, there are two types of scaling a texture after mapping it.
Using Rhino’s texture mapping tools (recommended)
Using V-Ray’s texture mapping tools
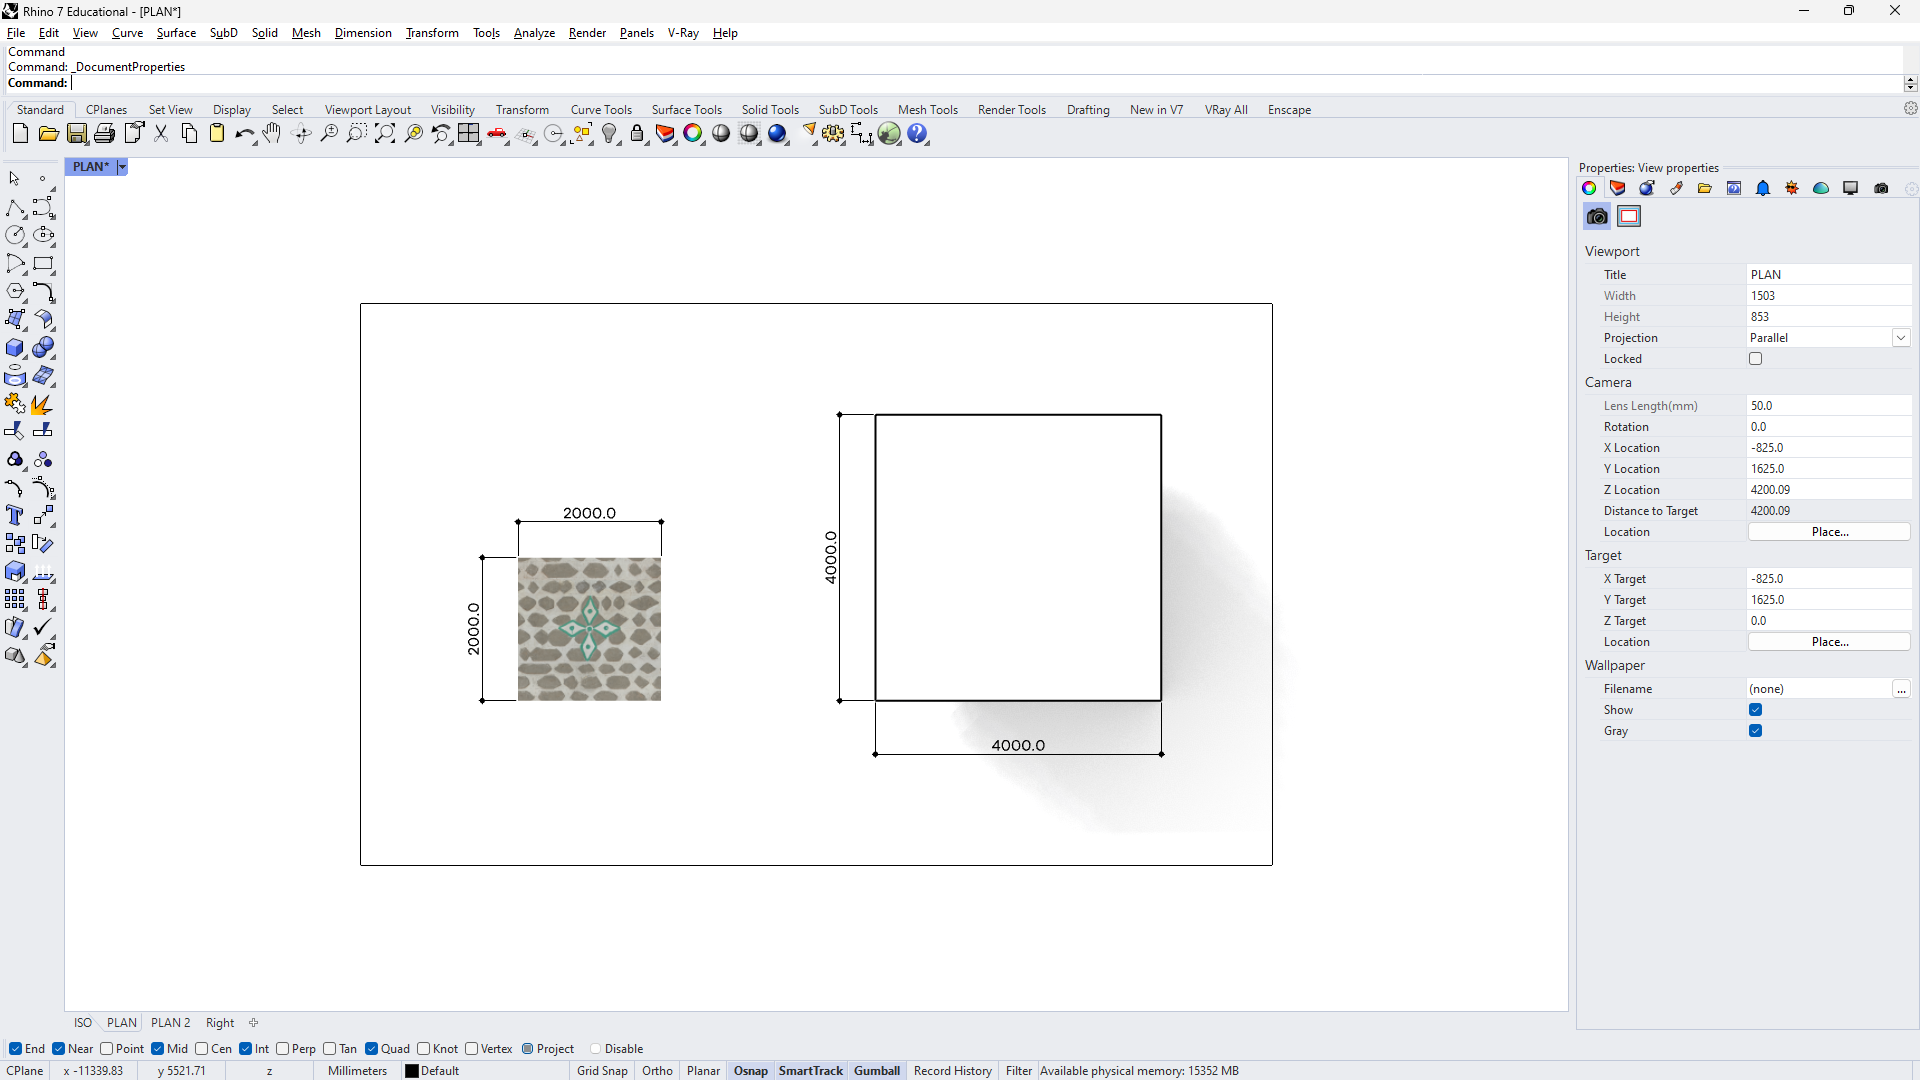
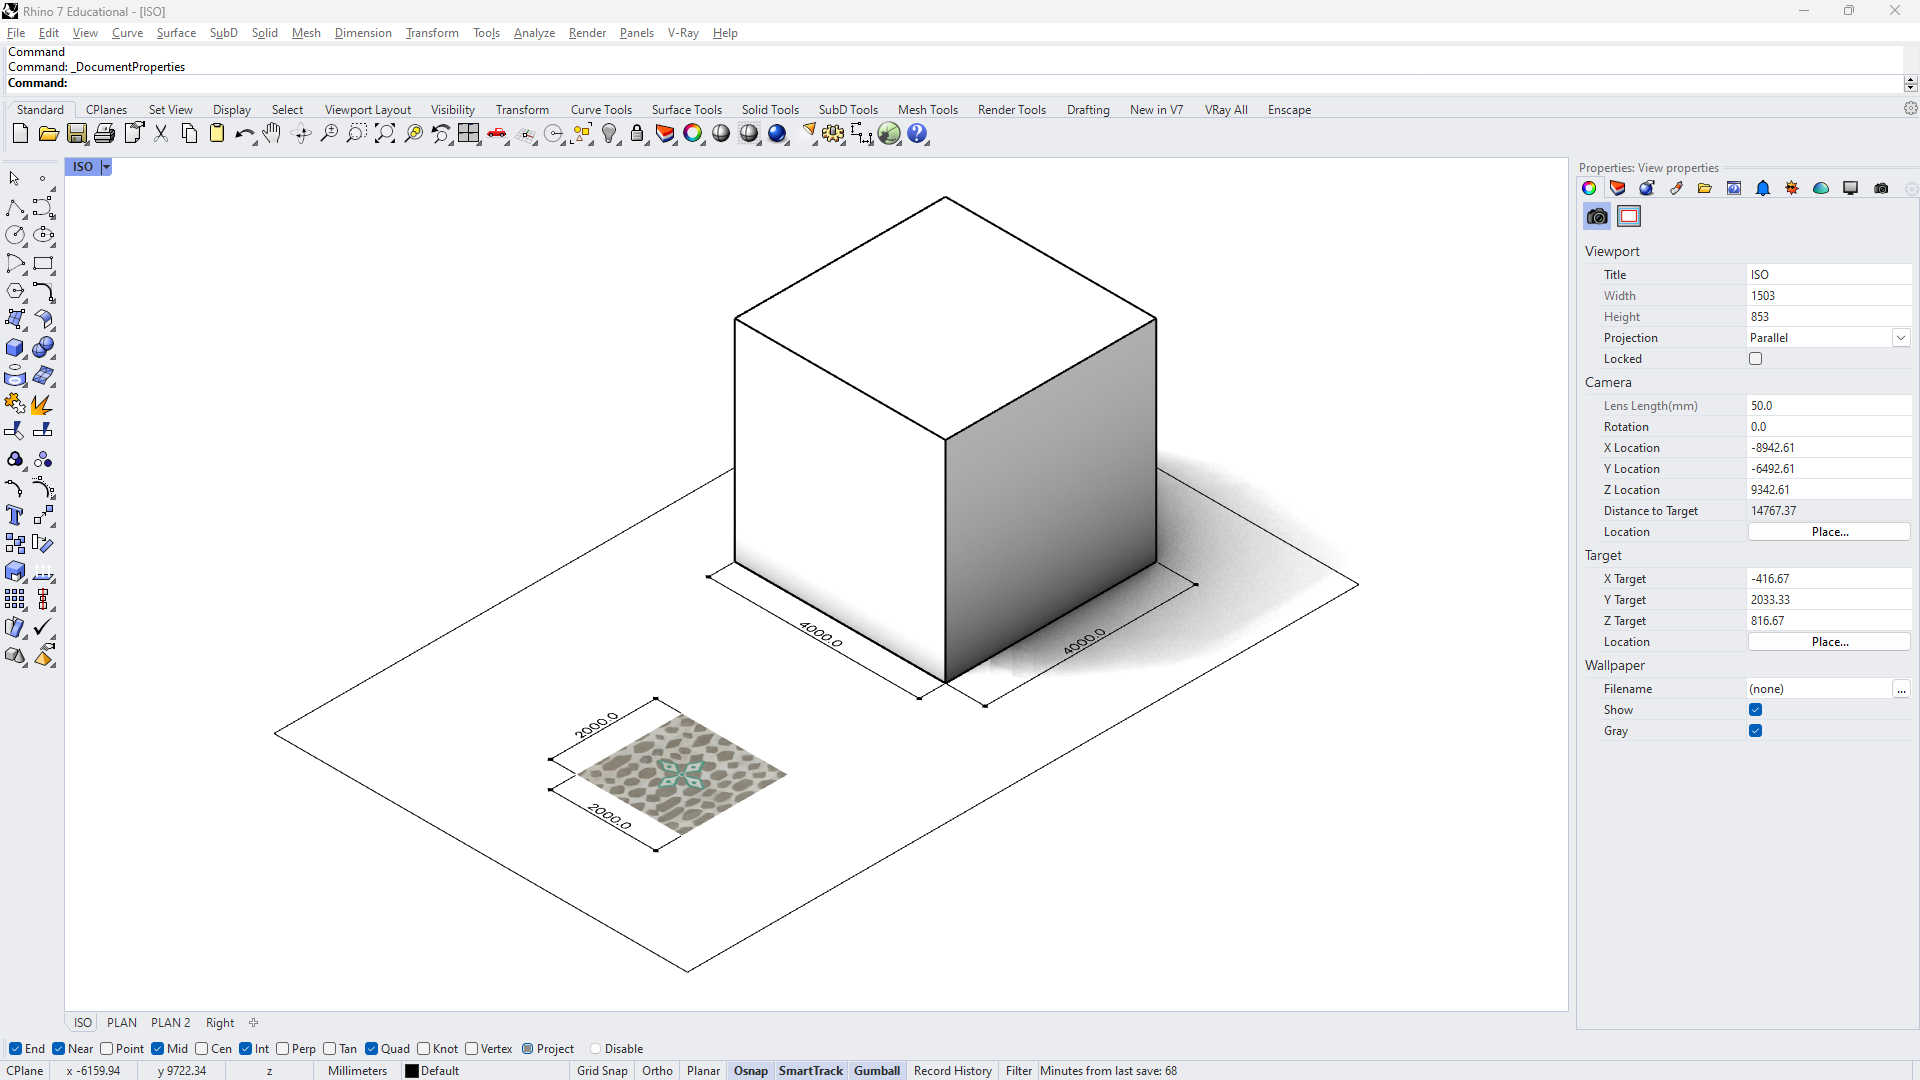
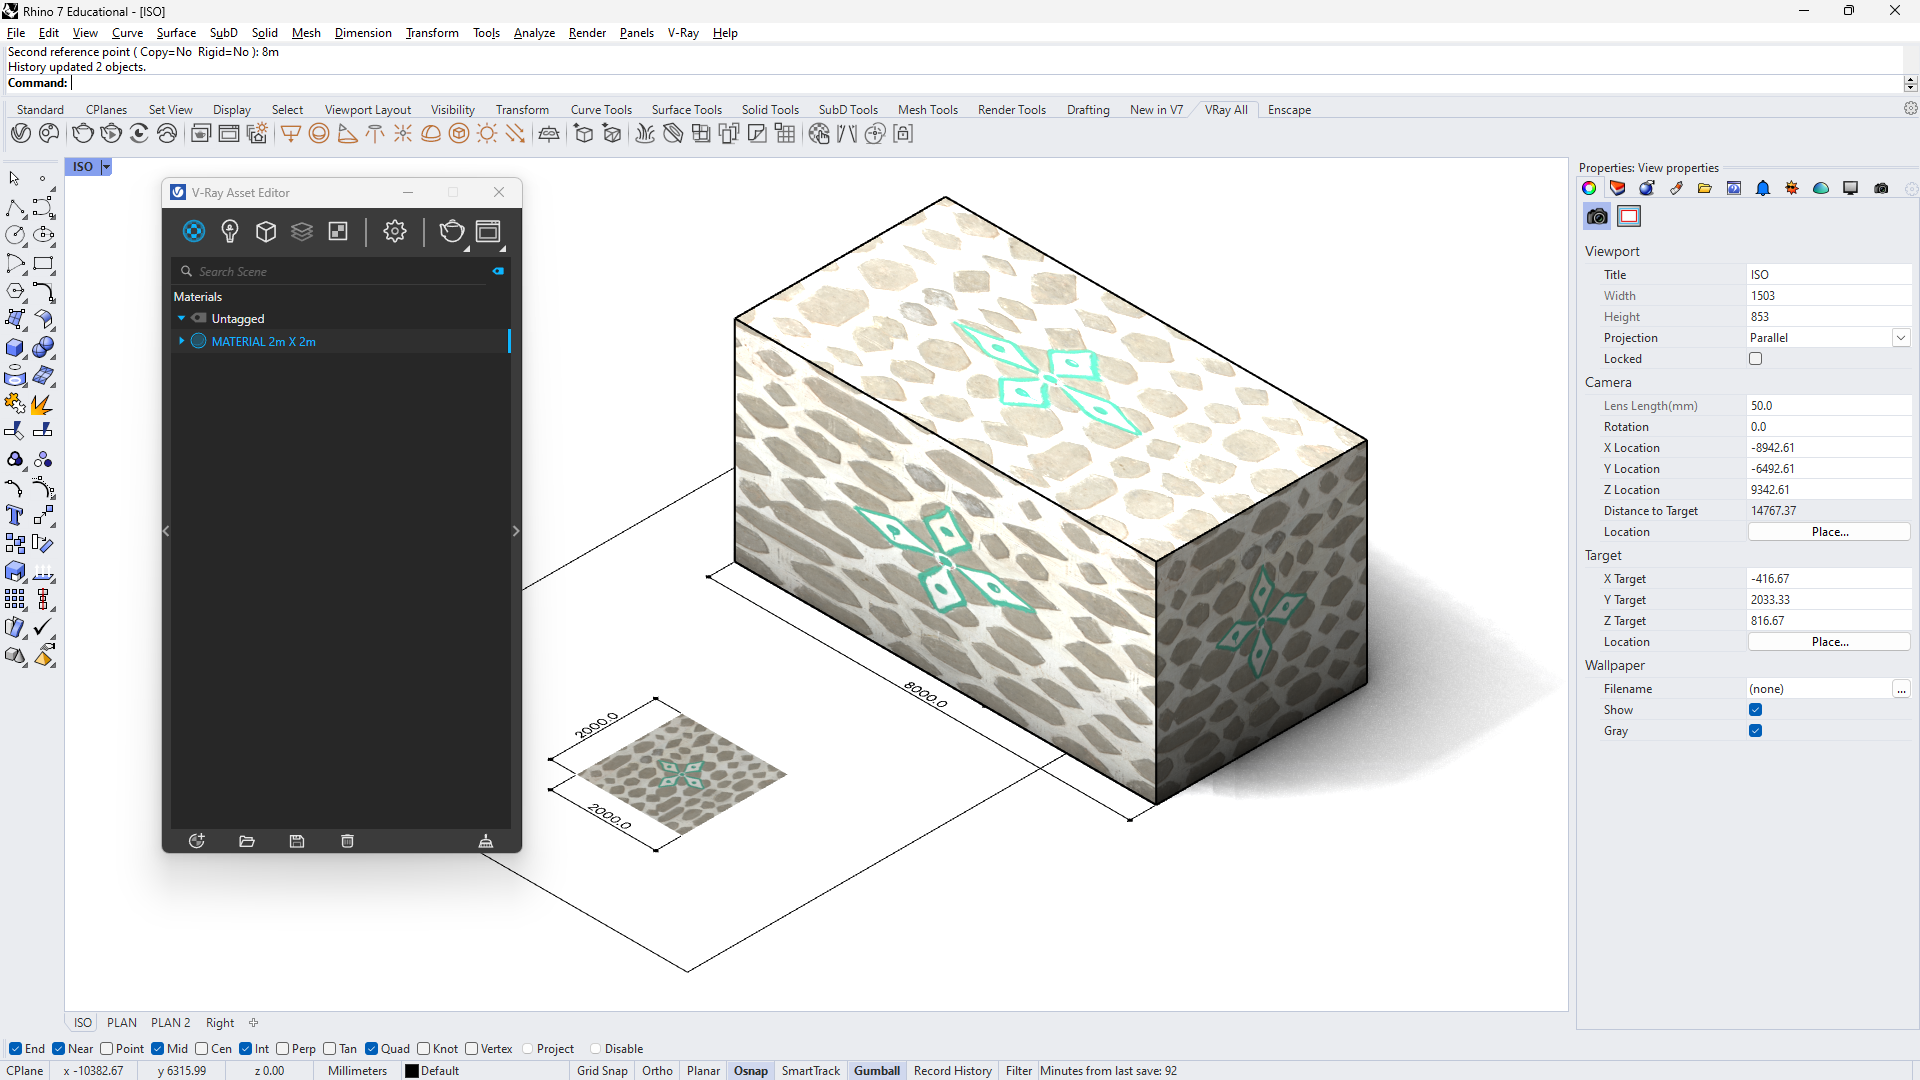
For this tutorial, I am using a texture with a known 2x2 meters square texture and a 4x4x4 meters cube.
RHINO TEXTURE MAPPING TOOLS
MAPPING ONTO GEOMETRY
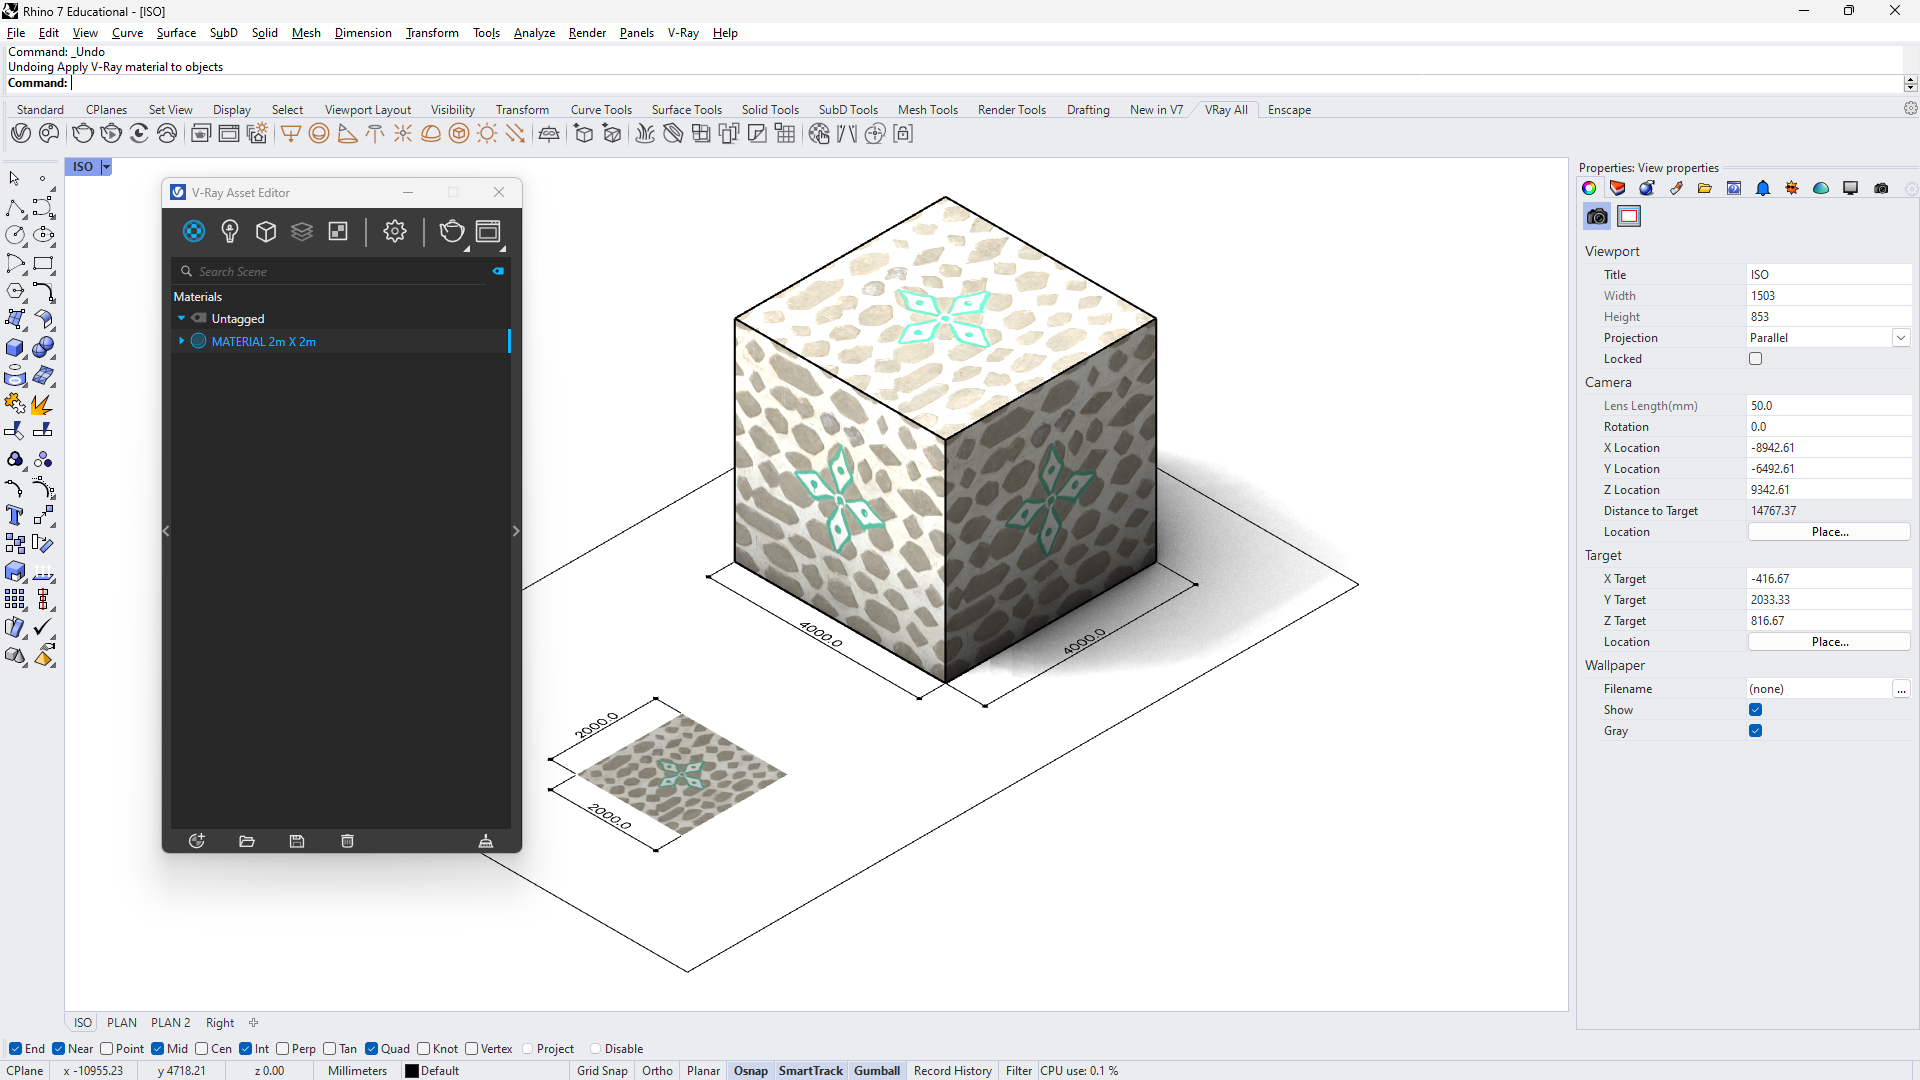
Apply a material to the geometry by simply dragging and dropping it from the V-Ray Asset Manager. Notice how the square texture of 2x2 meters now occupies the entire 4x4x4 meters cube and repeats once per face. If the object were to be scaled by a factor of two in one direction, the texture would automatically stretch to fit the faces.
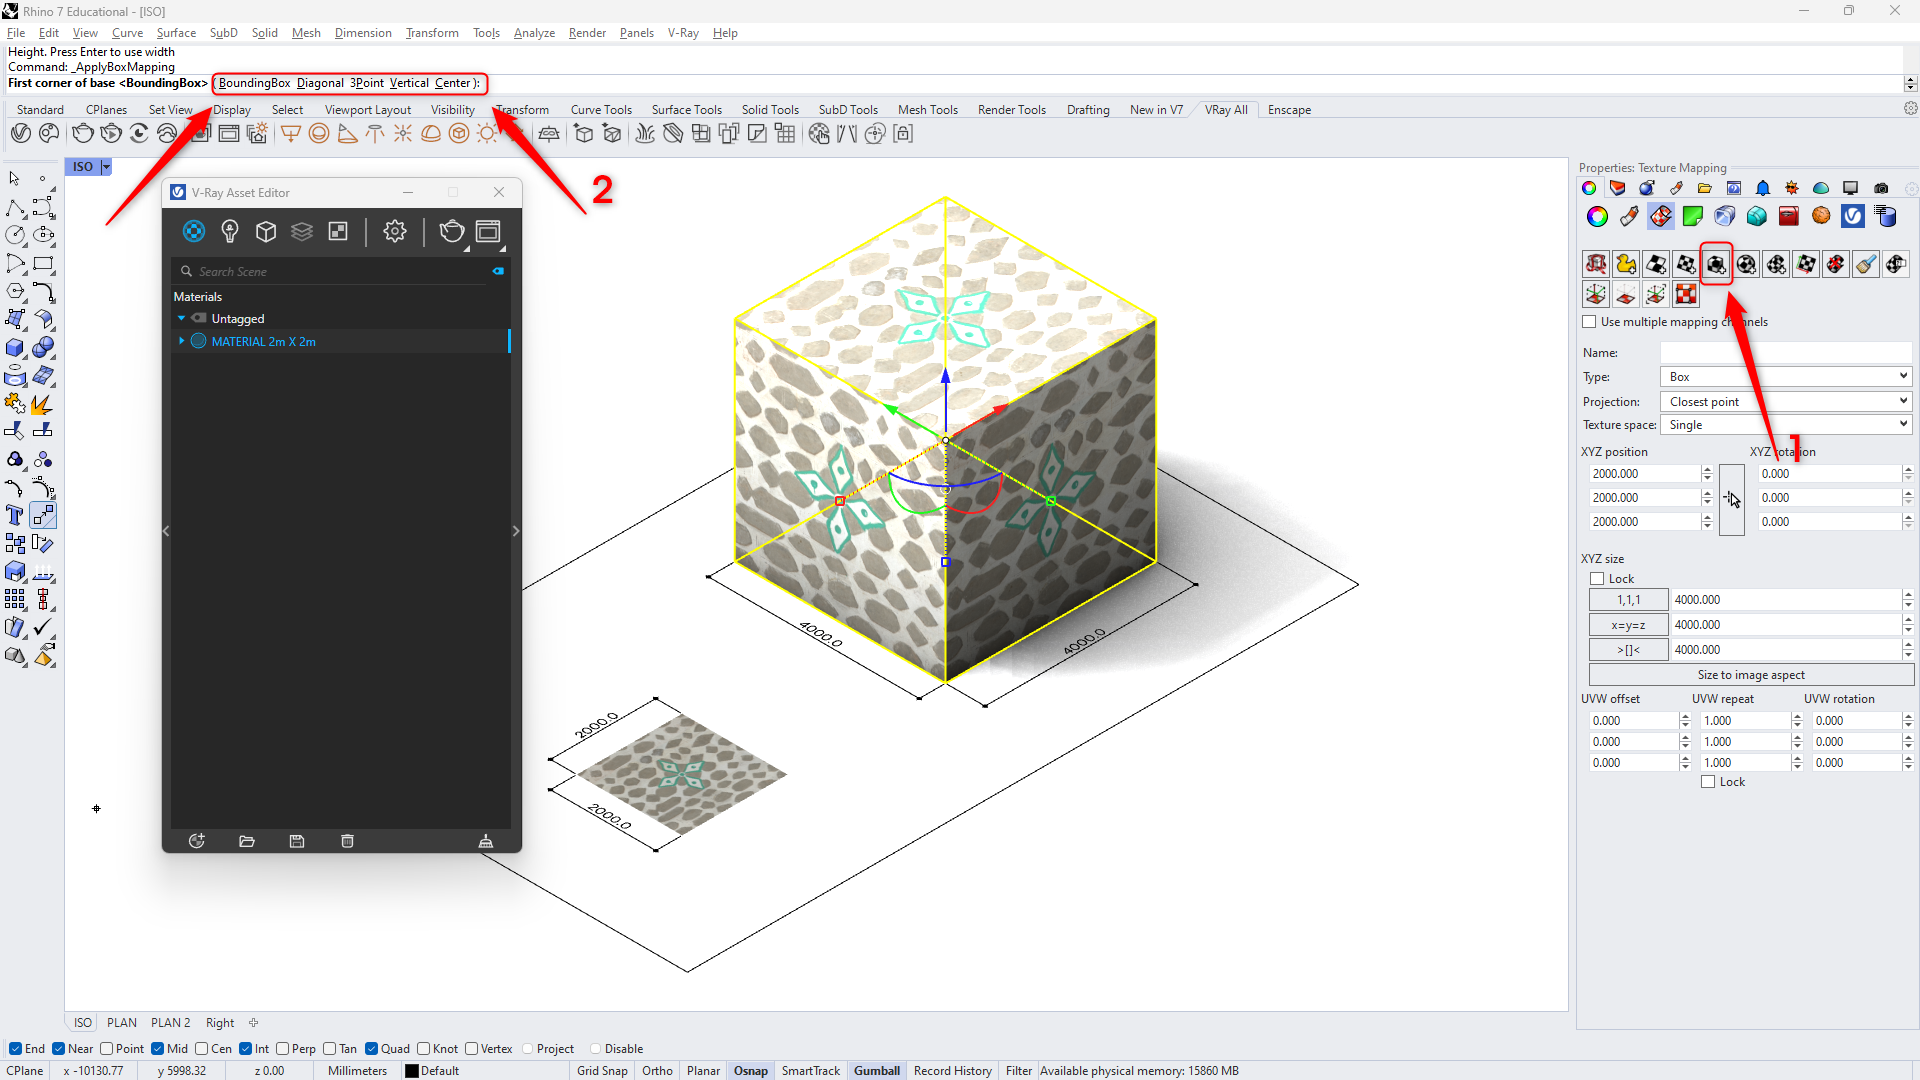
After selecting the geometry, go to the Properties Panel and select the Texture and Mapping option.
Select Apply Box Mapping.
Option 1 - Select 3 corners of the cube and answer Yes when asked if you want the texture capped.
Option 2 - Look at the Command Line and select the following: Bounding Box -> World -> Yes.
Or to go faster: b enter w enter y enter.
CCongrats, the box mapping is now in place and NOTHING has visibly happened, except for the XYZ size panel now showing the size of the texture along the X, Y, and Z axes.
SETTING MATERIALS’ REAL DIMENSIONS
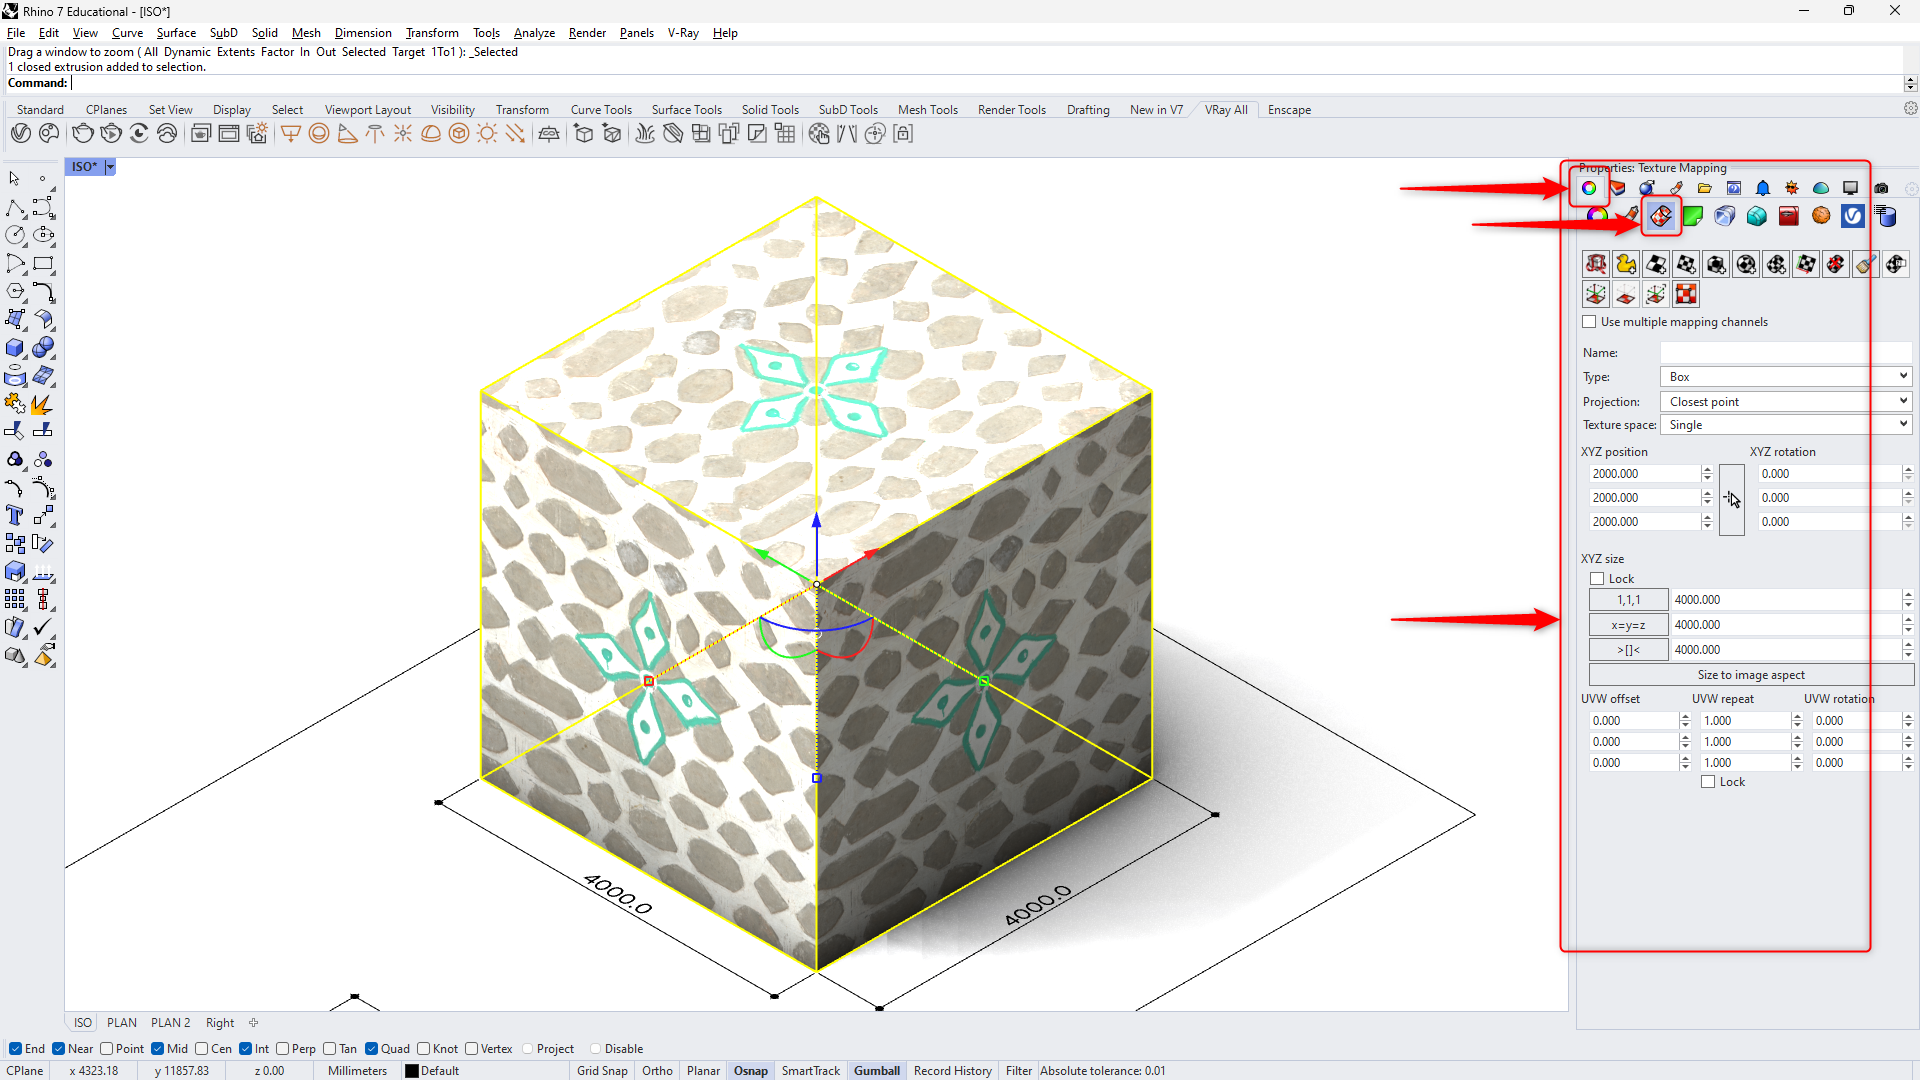
Select your geometry and make sure to navigate again to the Properties Panel and select the Texture and Mapping option.
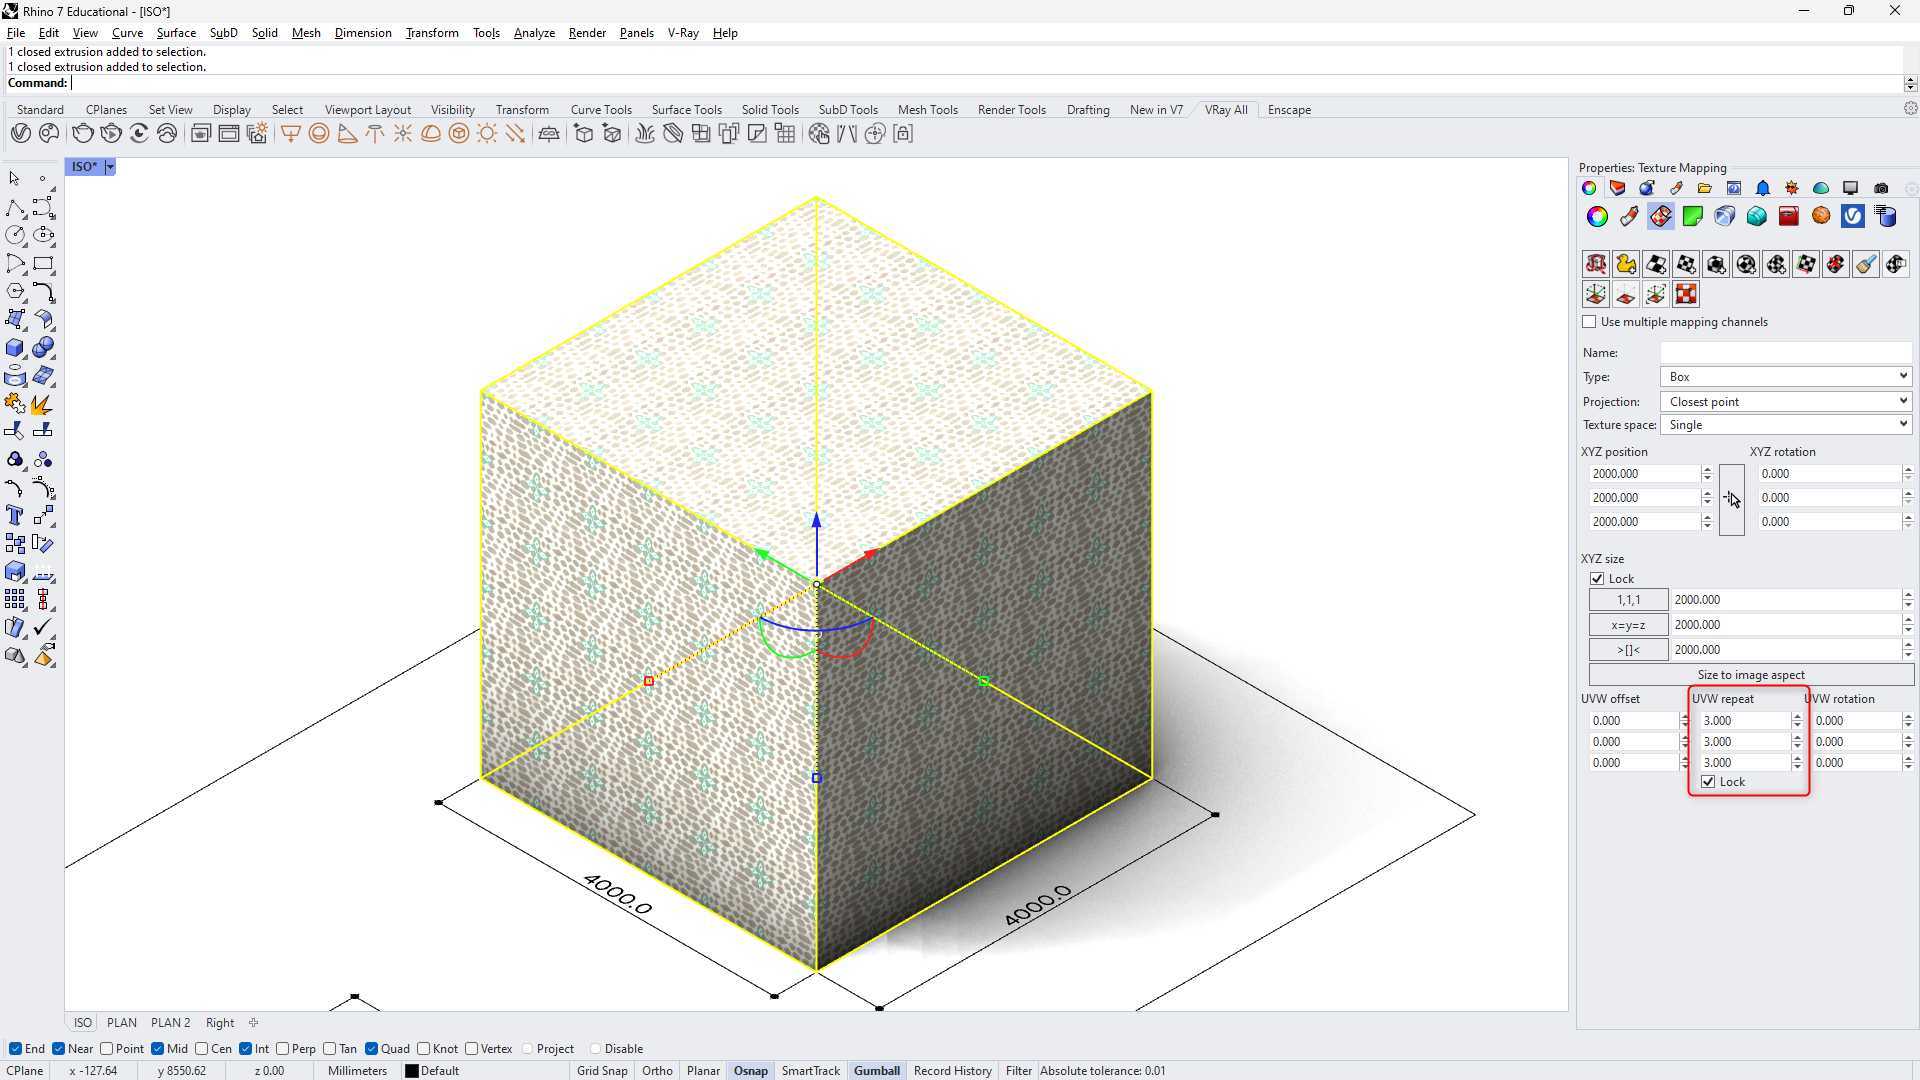
in the XYZ size segment, make sure to punch the real dimensions. My project is in millimeters, so I am specifying a value of 2000.
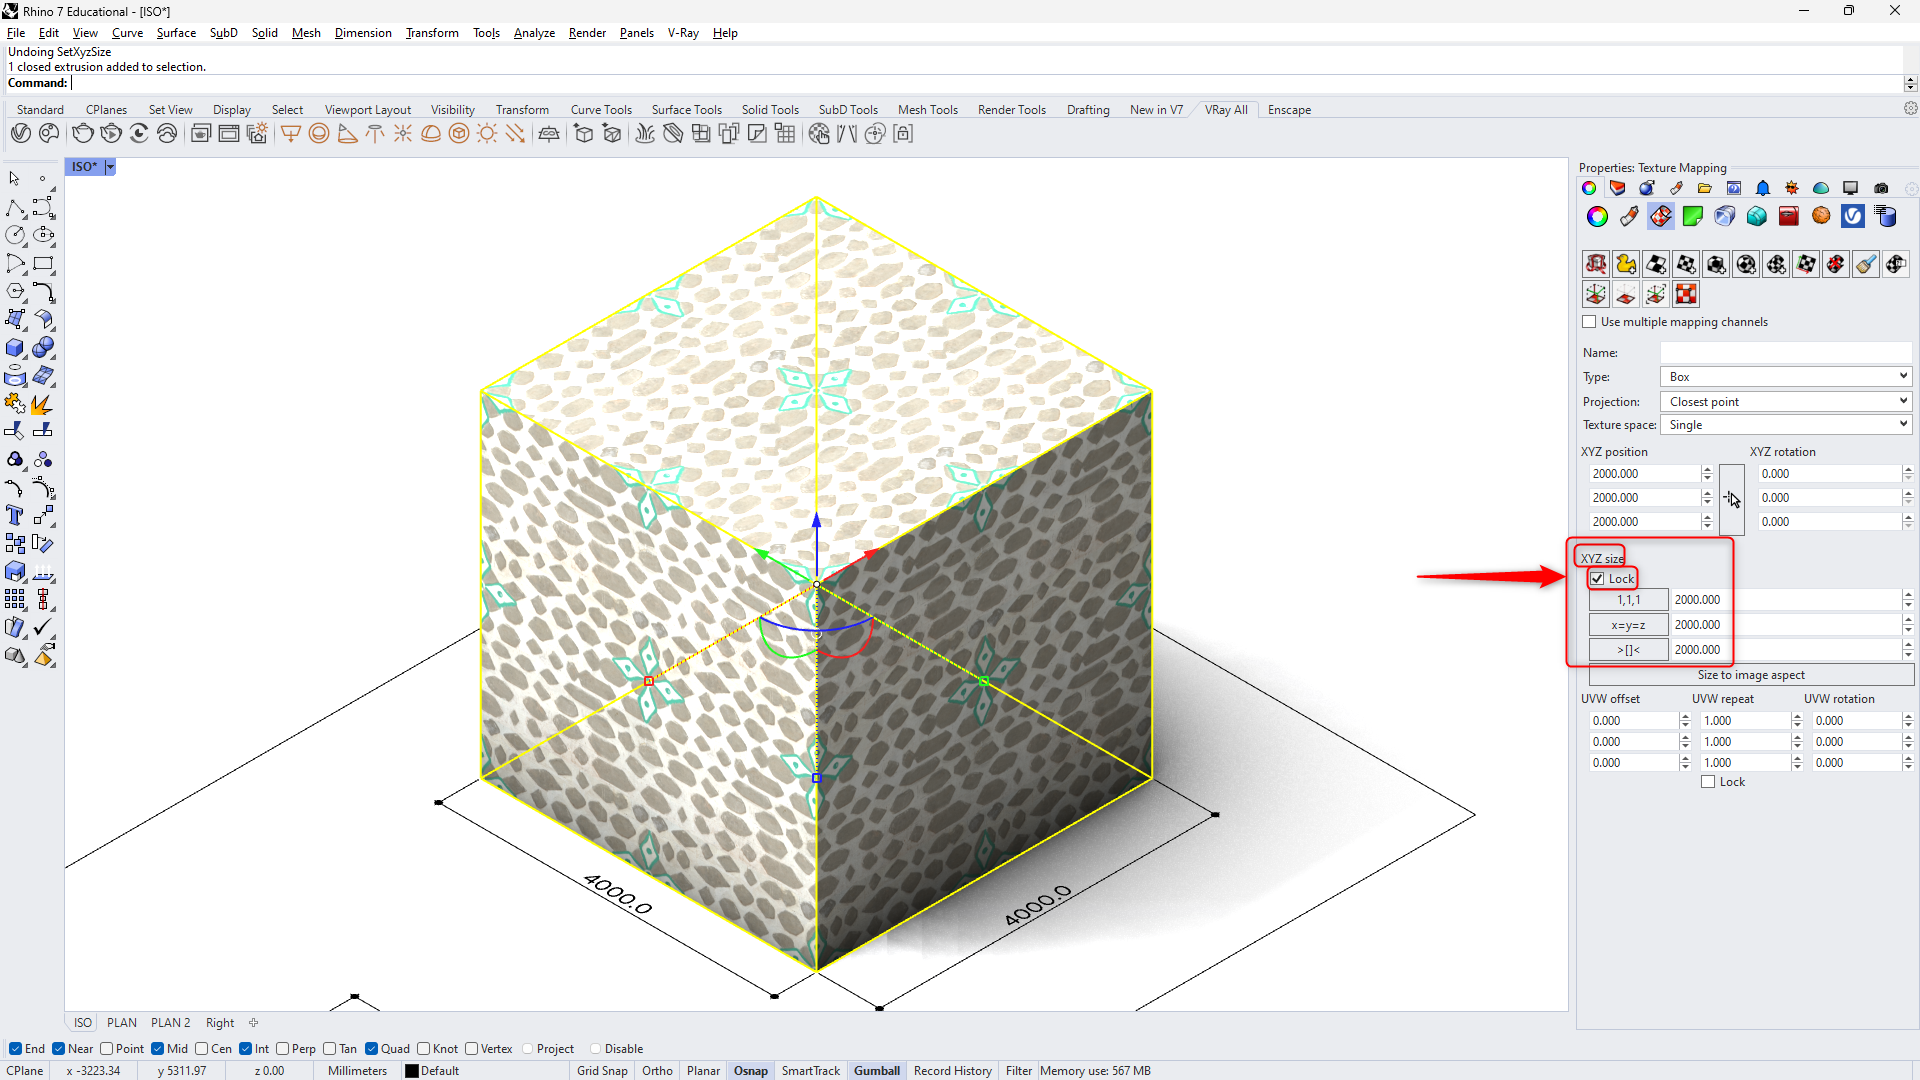
Make sure to lock the proportions. By doing so you save yourself the repetitive writing in each text box.
Congrats again, your 2x2 meter texture is now true to life and you should see it repeat 4 times on each face.
Additionally
Use the UVW Repeat underneath the ZYX Size section to repeat the material alongside each axis quickly. I would advise you to lock it as well and not NEVER put a value of 0.
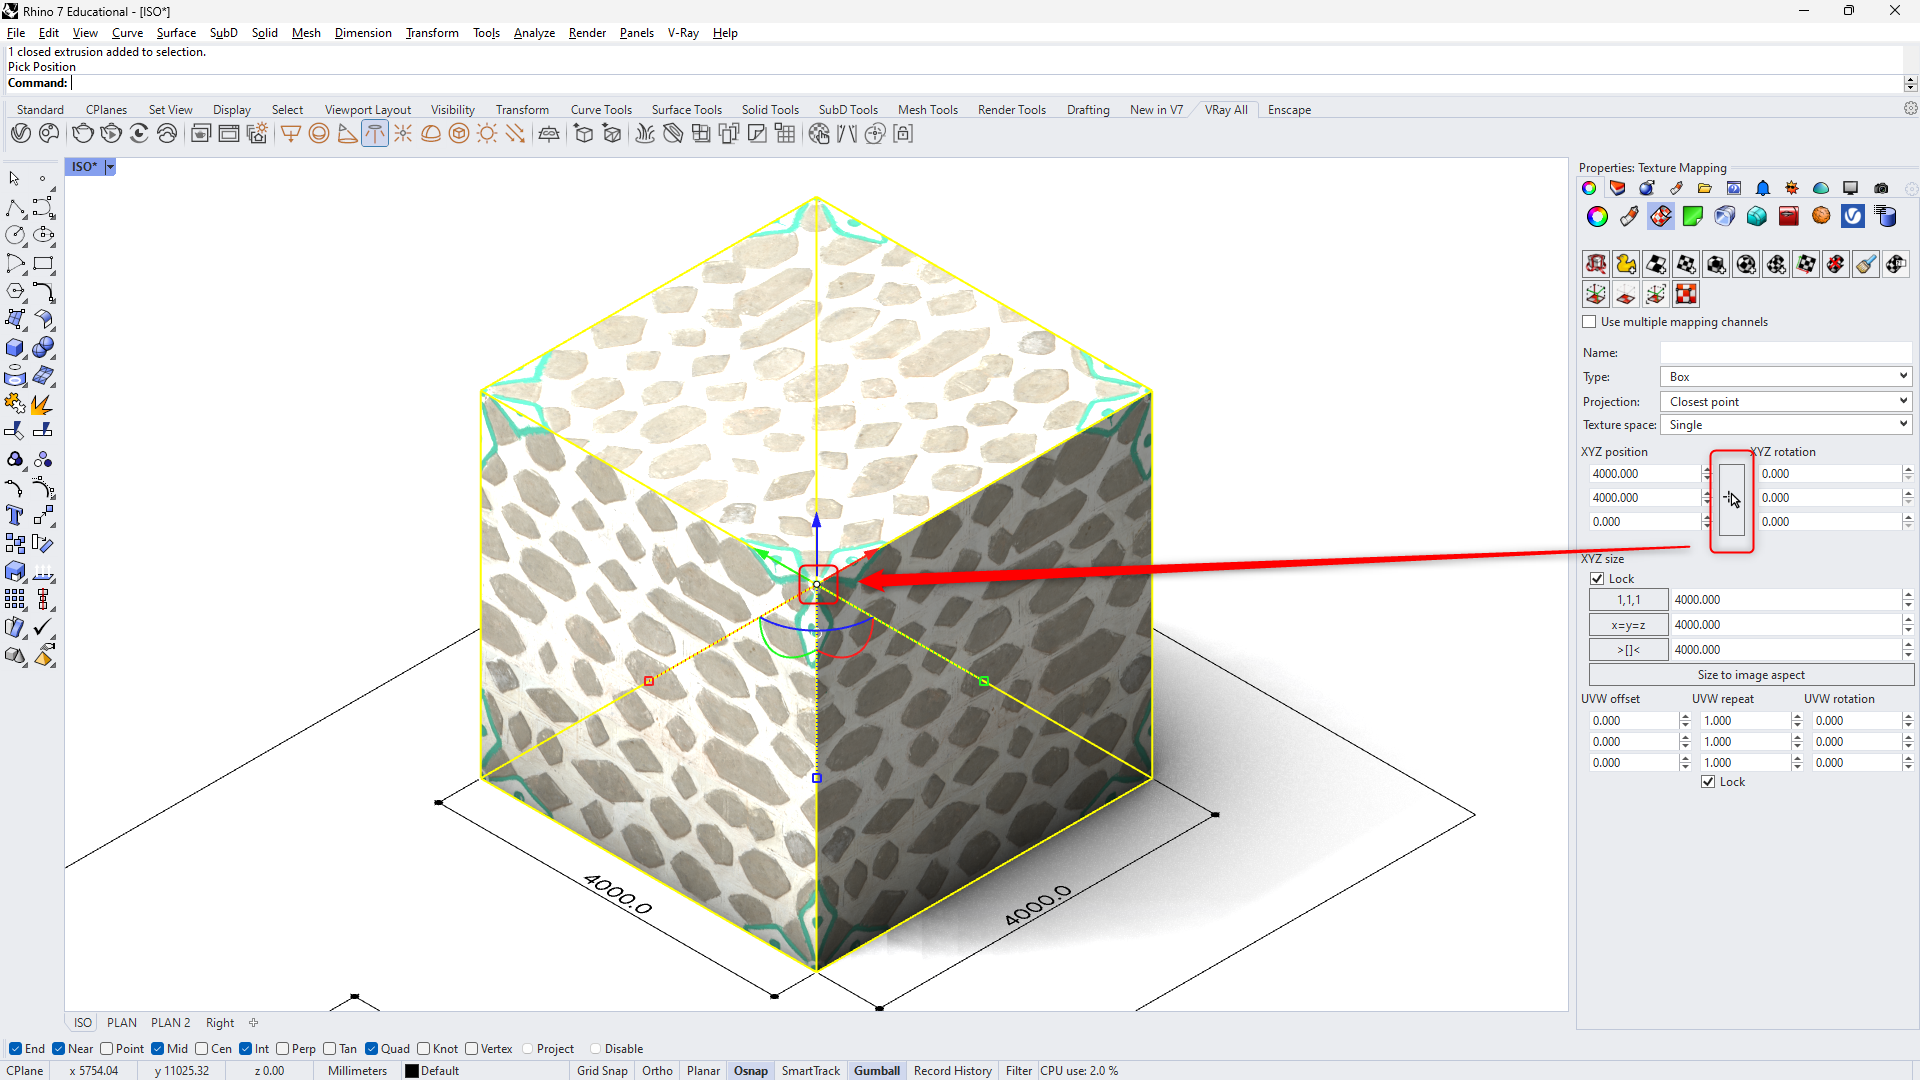
You can choose the origin of the mapping. By default, it will be in the middle of the geometry.
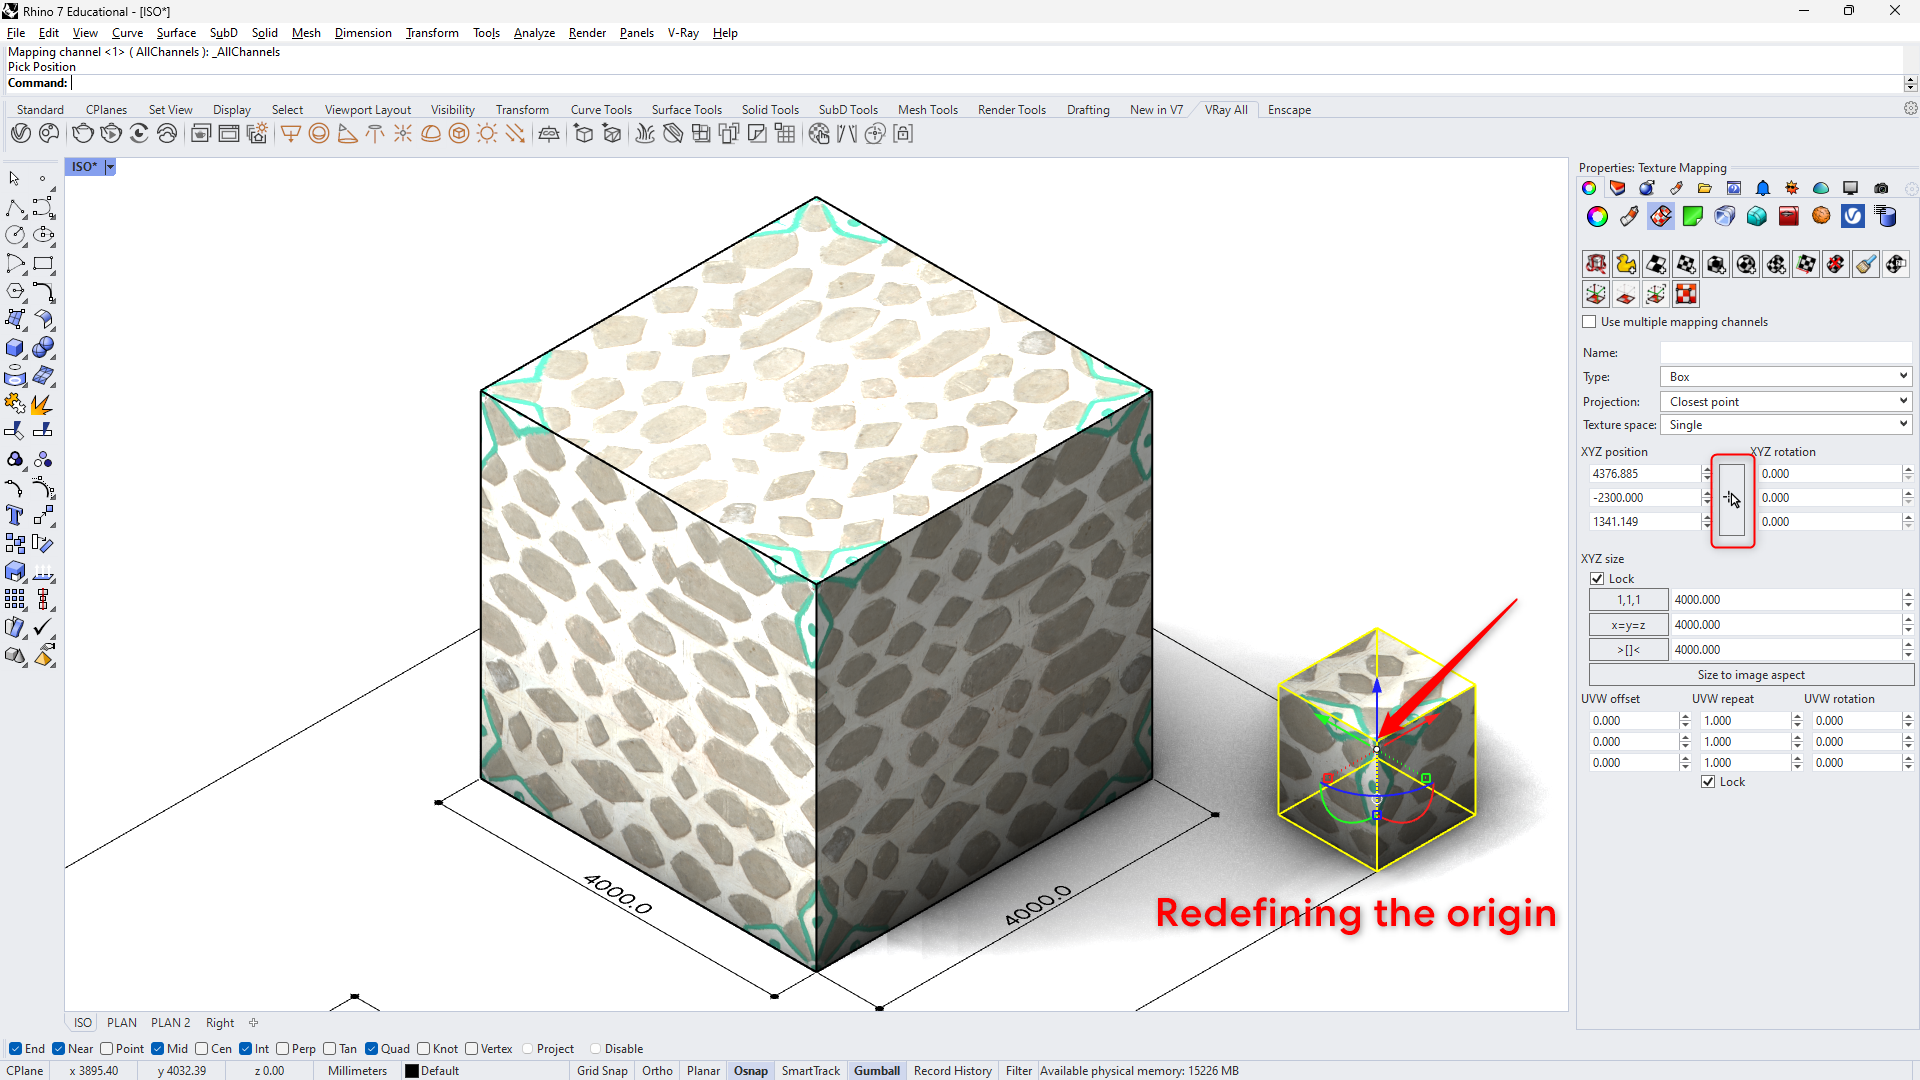
Simply click on the position button and select a corner, an edge, a curve, or anything to set the new origin.
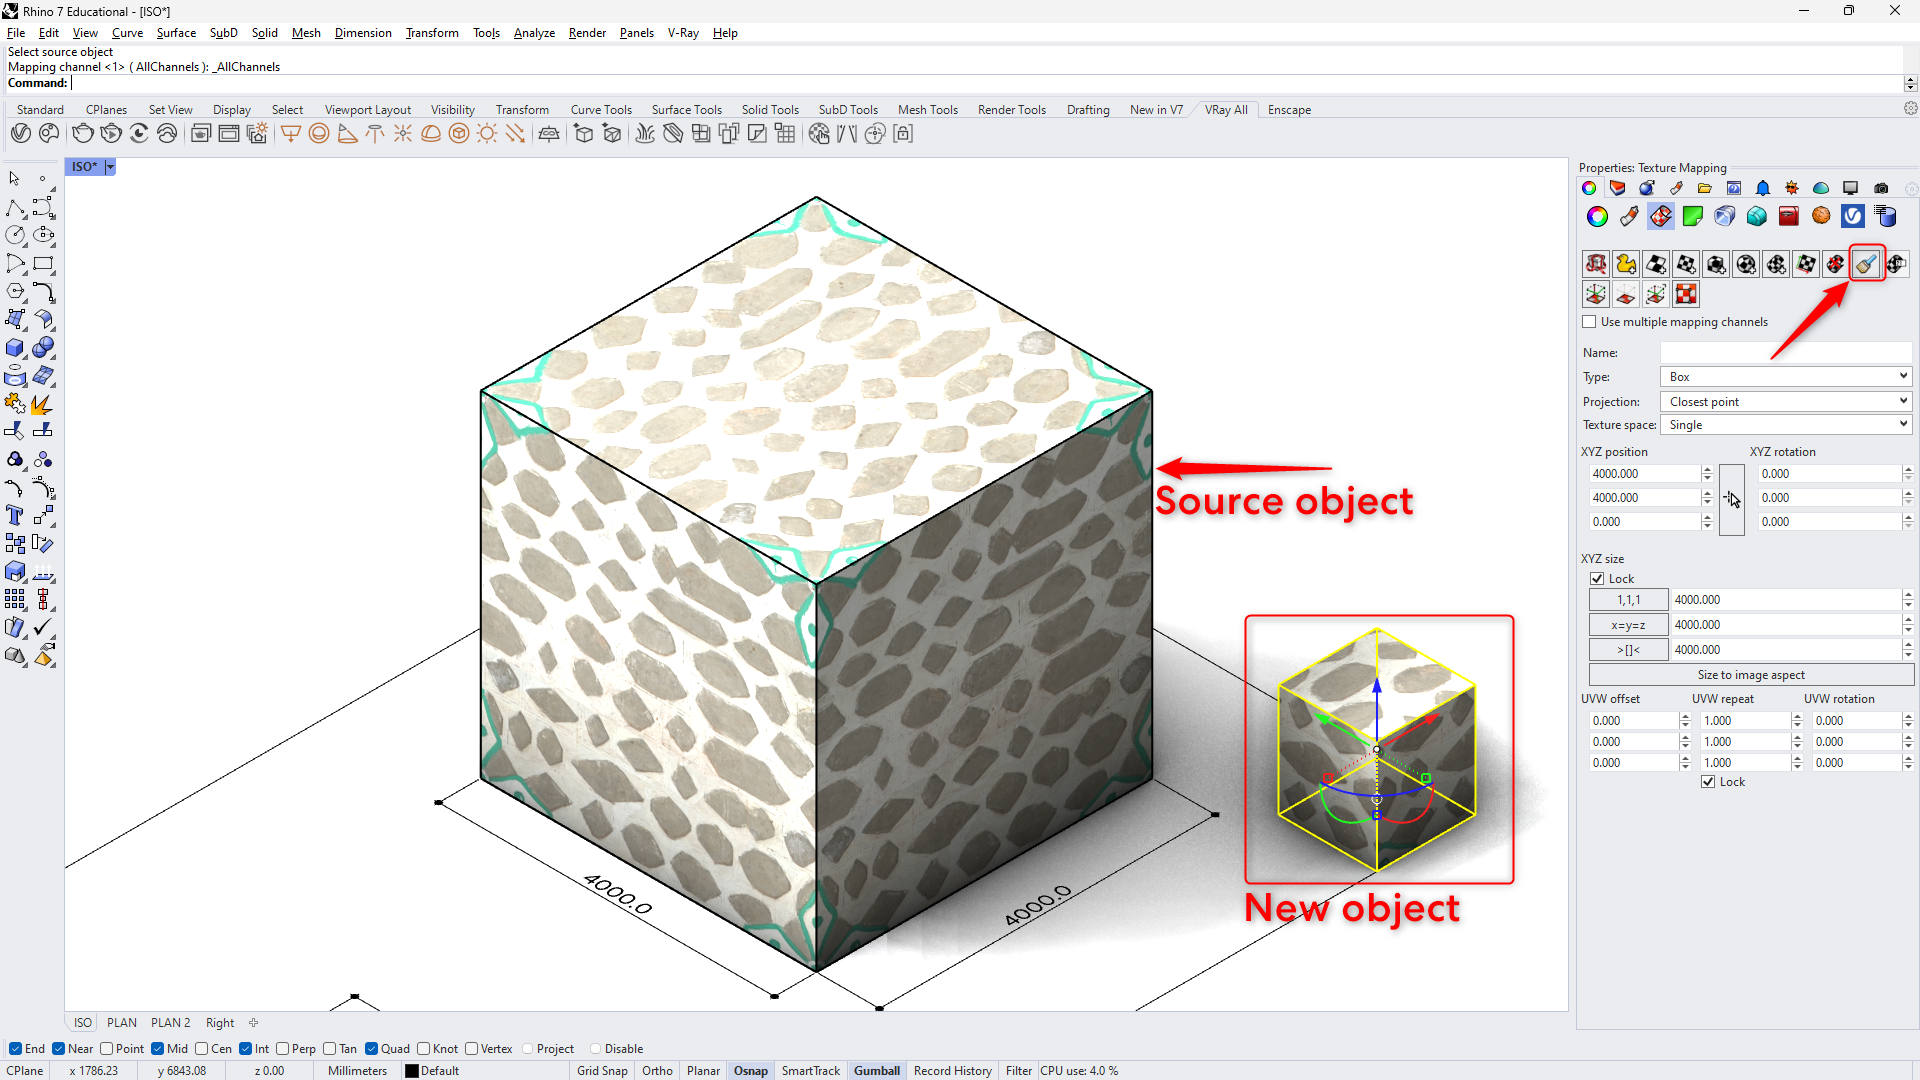
Rather than going through the entire process for every piece of geometry, you can Match Mapping.
Create a new geometry.
Select and navigate again to the Properties Panel and select the Texture and Mapping option.
Select Match Mapping.
Select a source object; in this case the large cube.
Make sure to change the origin of the texture as it will copy the one from the source object.
This is it… now you know how to box map. Go play!
V-RAY’S TEXTURE SCALING
To manipulate (scale, rotate, randomize, etc.) all maps inside a single material simultaneously, we need a UVW Placement texture which will be copied and pasted into the Texture Placement Type node for each map as an instance. Read this sentence again!
I have dedicated an entire video tutorial speaking about how to use UVW Placement textures for creating infinite materials here below.
Before using this method, you MUST first go through the previous steps. This is why I am not a fan of it, but I am talking about it since I want you to know your options. Read this sentence again!
Select the Create Asset button (bottom left of V-Ray’s interface).
Navigate to Textures -> UVW Placement.
A new texture is now visible under the Textures tab. Feel free to give it a better name if you wish.
Right-click on it and Copy it.
Open the Materials Tab and expand the material you wish to control. This will expose all bitmaps.
Select the first Bitmap
Expand Texture Placement and choose Mapping Source as a Type from the drop-down menu. The source will be the UVW Placement texture we just created and copied.
Right-click on the greyed-out icon and select Place as Instance. Read this sentence again!
Repeat on all other Bitmaps.
At this point, all Bitmaps in your material are controlled by a single UVW Placement Texture.
Navigate to the Textures Tab
Select the UVW Placement Texture
Make sure to lock the proportions of the Repeat U/V
Give a value to the Repeat U/V and you will see your material repeat as may times as you would like it to inside the real dimensions as described in part one.
Now you know how to scale all textures in V-Ray using UVW Placement Textures. Go play!
FINAL REMARKS
Unless you are doing material randomization (learn more about it here), I would stick to using Rhino’s built-in mapping tools. They are great and easy to use, especially in the presence of the Match Mapping function. Don’t forget that all of Rhino’s mapping tools work for a single geometry, or multiple of them as long as they are all selected and not found in groups. In your beginner stages, if you don’t understand the last sentence, it is all good, we will cover it in another blog/video.
Thank you for stopping by and I hope you are leaving having learned something.
Keep on creating!
Daniel


